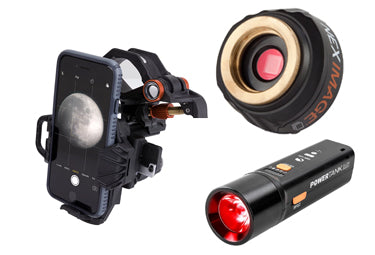


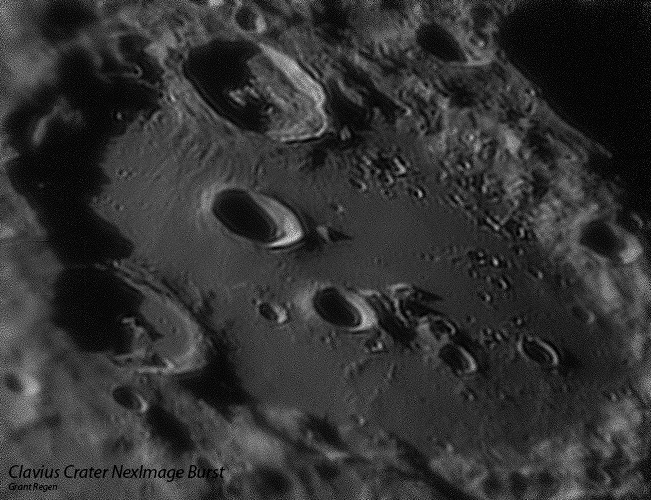
Heliocentricity: Introducing the NexImage
April 14, 2016
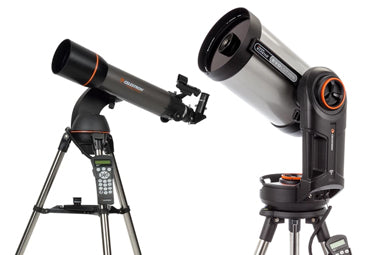
Since beginning my blog series, Learning Skyris, I have focused on advancing readers’ knowledge of Celestron’s Skyris CCD camera. Now, after almost three years of Skyris blog posts, I will aid starting astrophotographers with a new series, Heliocentricity, exploring two of Celestron’s most popular planetary imagers—the NexImage Solar System Imager and the Skyris Astronomical CCD Camera. While the devices’ specifications differ immensely, a beginning astrophotographer incorporates identical imaging techniques with both cameras. This introductory article teaches users of NexImage and Skyris the basics of planetary astrophotography and assists interested astronomers choosing between the two instruments.
Although Skyris produces higher quality images when compared to NexImage, the “runner up” camera forms substantial competition with a lower price and fantastic photos under clear conditions. Astronomers committed to learning planetary astrophotography should consider investing in Skyris, but if unsure or tight on budget, aspiring astrophotographers should research the NexImage as a step into a new realm of recreational astronomy. Lunar and solar images of NexImage and Skyris appear similar with the exception of the larger imaging area of Skyris, favorable to mosaic images of vast areas and large aperture telescopes. If more interested in planetary imaging of Saturn and Jupiter, though, Skyris’ USB 3.0 connection allows for extremely fast frame rates, important for Saturn and Jupiter, two dimmer, rapidly rotating objects.
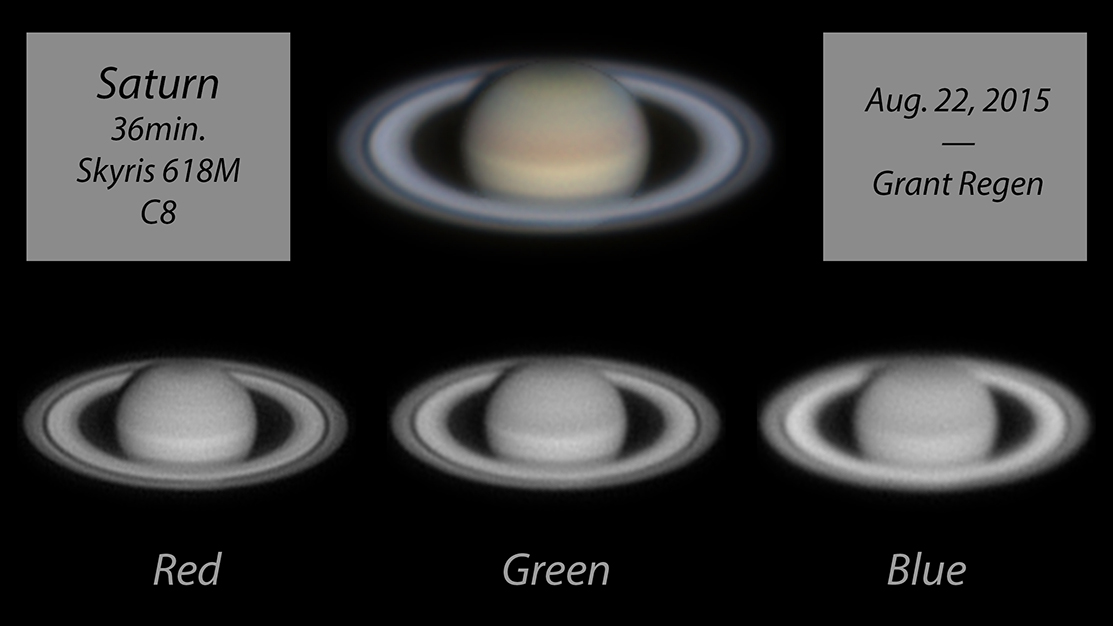
Under clear skies, however, NexImage preforms well against Skyris, as seen in the two images of the quadrature of Saturn, or when Saturn casts the largest shadow on its rings from Earth’s perspective. Skyris’ image retains only slightly more detail on the planetary orb. Additionally, the lunar shots with both cameras display similar quality with Skyris’ showing greater area and detail due to the imager’s superior sensor.

Both instruments produce stunning images with proper processing and capturing techniques. Past blogs on preparing the setup and capturing the planet hold relevant information for both Skyris and NexImage, but comprehensive processing guides for all cameras abound in this post. Future blogs will explain techniques specific to each camera and celestial object to obtain the most out of the imager. As an overall guide for capturing dim planets, however, I usually record several LRGB video sets to later compress multiple color images, drawing out further detail and decreasing noise from heavy processing.
While images of the moon only need simple processing covered in previous posts and “slow” planets—Mars, Venus, and Mercury—require only simple RGB compression (explained below), Jupiter and Saturn demand a detailed process of alignment, RGB compression, and de-rotation. Initially, though, I save all of my videos of any target as .AVI files in Virtual Dub. This step ensures that no video corruption arises in future processing.
Once saved, the processed files are dropped in AutoStakkert!2 for stacking. Registax can also stack videos but fails with longer recordings and takes exorbitant amounts of time. Registax’s wavelet tools then refine stacked images as finalized monochrome photographs or, if using a color camera, color photographs.
When using LRGB filters, Photoshop helps transform stacked, refined single channel images into beautiful color portraits. This guide below narrates the specific instructions needed to accomplish the pertinent step in processing:
Photoshop RGB Alignment and Compression-
- Open all three images as separate, individual photographs in Photoshop, not different layers. (Use command click on Macs or control click on PCs to select all three to drag into Photoshop.)
- Fit each image to the screen using the magnification tool. (Use the same magnification for each image. I prefer the “fit screen” option.)
- Unlock each photo by tapping the lock symbol in the layers panel.
- Use the free transform tool (edit, free transform or command/control “T”) to rotate each image until balanced. (Images can be rotated in any way as long as each image is in the same orientation. I use the rings of Saturn or the bands of Jupiter to align all of the images.)
- Hop from one image to the next to ensure that each photo is in exactly the same rotational orientation. (Maintaining the same magnification makes this step much simpler.)
- Save each rotated image as a .tiff file that is a copy without layers. If the image is saved with layers, the next steps will not work.
- Open the three “copy” files into Photoshop as separate images.
- Convert each image from an RGB format to a greyscale image. (Image, Mode, Greyscale)
- On one of the images, go to the channels tab in the layers panel and you will see a layer labeled “grey.” To the far right of the channels tab, press the list button. A list of options will appear starting with “New Channel.” Click “Merge Channels.”
- Lastly, select RGB color for the mode, align each color with its designated image, and merge the three monochromatic images.
Once the color images of your target have all been saved from Photoshop, each must return to Registax to correct color distortion caused by differences in brightness:
Registax Color Correction-
- Drag the RGB color photo into Registax where the program will automatically forward the photograph to the wavelets section.
- In the “Functions” area on the far right, choose RGB Alignment.
- Expand the green box to encompass the entire planet, and hit estimate.
- Close the alignment box and open “RGB Balance.”
- Select “auto balance,” and the “Do All” button at the far top left.
- Save the image and repeat with the other captures.
If you only captured one set of RGB photographs, this color corrected image can continue past WinJupos to the next Photoshop editing. WinJupos combines multiple color images together with precision of less than a minute to decrease noise and emphasize detail. Here is the guide for a de-rotation technique:
WinJupos Planetary Stacking and De-rotation-
- Open WinJupos and confirm that the software is on the correct celestial body. (Program, Celestial Body)
- Open the image measurement tool. (Recording, Image measurement)
- Select “Open image” and put in the date and time of the middle of the RGB videos.
- Choose the adjustment tab (Adj.) and use page up and page down to increase the size of the outline, the arrow keys to change its position, and n and p to change the rotation. Once the outline is fitted to the planet as well as possible, save the image measurement and repeat the process with each color image.
- Open the “De-rotation of images” box. (Tools, De-rotation of images…)
- Click the “edit” box at the upper right and add all of the image measurements. Then, select “compile image.”
- If the image—especially for Saturn—has dark of light rings around it, it is because the image measurements did not perfectly align with the planet. The “weighting” and “LD value” tools in the image measurement box can solve this problem. Make the weight of the first image zero and compile the image again; repeat this, making one image weight zero, until the faulty measurement is found by the lack of white or black rings. Once found, change the LD value of that image to be either brighter or darker to compensate for the ring.
- Assign different weights to each image according to their quality, and test by compiling the image until a perfect ratio is found.
Now that a finalized color image waits on the computer, Photoshop enables its user to present the masterpiece with elegance. If you like viewers to also see the red, green, and blue channels, a more scientific look, I created a layout to easily present the data.
Finalized Photoshop Editing and Layout-
- Open the finalized, stacked color image in Photoshop to clear the background of any noise.
- Using the zoom tool, make the planet cover the entire screen.
- Use the quick select tool to select the planet, tightly outlining the disk. (Shortcut for quick select is W)
- Expand the selection by five or so pixels. (Select, Modify, Expand…)
- Feather the selection by four or so pixels. (Select, Modify, Feather…)
- Invert the selection. (Select, Invert; or shift, command/control, I)
- Press delete and fill the selection with black, or fill selection with black manually (Edit, Fill, Black).
- Crop the image however needed, and add contrast and saturation if wanted.
- Save the color image as a finalized version.
- If you would like, you can use my template downloadable on this blog in Photoshop to continue the next steps of creating a RGB and color chart.
- Open the three most detailed images of the original red, green, and blue channels as separate images in Photoshop as well as the RBG image and the template.
- Go to the color photo and select the entire image (command/control, A). Then, copy the image (command/control, C).
- Go to the template and choose the layer with the central black rectangle. Use the magic wand tool (shortcut is W) to select the entire rectangle.
- Paste the color image into the selection. (Edit, Paste Special, Paste Into)
- Use the free transform tool (Command/Control T) to reposition the planet to take up as much of the space as possible.
- Select one of the other bottom black box layers and use the magic wand to fully select it.
- Go to the single color channel image labeled below the black rectangle. Select the disk of the planet with the quick select tool. Expand the selection by five or so pixels; then, feather it by four or so pixels.
- Copy the selection, and paste it into the bottom black rectangle. Using free transform, fill the space with the planet.
- Repeat the process with the other two black boxes.
- Select the text box layers and write in information such as telescope, planet, telescope, date, and name.
- Save the finalized chart as a .jpeg with a black matte.
With your finalized portrait of the planet, it’s time to share the hard work with the world and enjoy the sight of an alien world. In future blog posts of Heliocentricity, I will cover specifics of each future target starting with the next blog post about white light captures of the sun to prepare readers for the transit of Mercury in early May.
Happy imaging, Clear skies,
Grant Regen