Your original NexImage #93712 camera will work with Windows Vista 32-bit and 64-bit and Windows 7 32-bit and 64-bit operating systems. Here’s how to install the necessary drivers and software.
These instructions are specifically for Windows 7. However, Windows Vista 64-bit is very similar; it just takes a different driver (as detailed below) and Vista has more permission boxes pop up. In this procedure, always press “Allow” or “Continue” when asked by Windows to do so.
Note: Please read these instructions thoroughly before installing the drivers and software. The appearance of your screens may differ from those seen here, but should be very similar.
The easiest way to install the driver for the NexImage camera is by downloading it from the Internet, then installing the downloaded driver instead of using the driver (Windows XP) on the CD. Since the NexImage camera is based on the PhilipsToUCam, a Philips Windows 7 driver will allow the camera to be used with either Windows 7 32-bit or 64-bit operating systems. First, insert the NexImage CD into the PC’s CD drive to install the image capture software. You will see a DVD/CD message window offer “Run Menu.exe” as a choice. Click this choice.
Next you will see the NexImage CD menu:
Click on “Install Capture Software.” Just follow the instructions, clicking “Yes”, “Continue”, “Next” until the installation is finished. Exit the NexImage menu by clicking on “Exit.”
The desktop will display the AmCap shortcut icon. Remove the CD from the drive.
Next, go to the Philips website to download the SPC900NC/00 camera application:
http://download.p4c.philips.com/files/s/spc900nc_00/spc900nc_00_dw7_eng.exe
For Vista 64-bit, use this link and file:
http://download.p4c.philips.com/files/s/spc900nc_00/spc900nc_00_dwv_eng.exe
(NOTE: Some computer firewall settings and Internet Explorer settings may not allow downloads of these .exe or executable files. To avoid these issues, instead go to these files in the Celestron downloads archives.
Windows 7 32 and 64-bit:
http://downloads.celestron.com/Archives/Drivers_Software/NexImage/spc900nc_00_dw7_eng.zip
Vista 32 and 64-bit:
http://downloads.celestron.com/Archives/Drivers_Software/NexImage/spc900nc_00_dwv_eng.zip
They are zipped or compressed files. First, choose the one you want, either Vista or Windows 7. Click on the link. Then you'll be asked to choose "Save" to save the file to your desktop. Finally, you’ll need to click on the folder you saved to your computer’s desktop and then click on the file inside to run the driver installation program).
In the screen (dialog box) that opens, choose “Save” and save the file to your desktop.

Start the drivers installation by clicking the file icon on your desktop.
In Vista, one of the permission boxes will pop up, “An unidentified program wants to access your computer. Press “Allow.”
Just follow the instructions, including restarting your computer.

Once the PC has restarted, plug in the NexImage. A balloon will appear saying, “Drivers installing” then, “Device driver software was not successfully installed.”
Click on Start – Computer – System Properties – Device Manager. 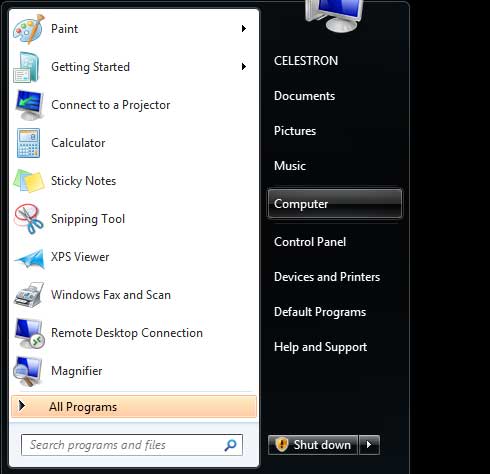

In Vista, it will ask for permission to continue. Give permission to continue.
A list of devices connected to your computer will appear. Look under “Other devices.” You’ll see “Unknown device” with a yellow alert symbol.
Right-click on the “Unknown device” entry. 
Select “Update Driver Software.” Now you will tell Windows 7 just where to find the drivers.
Click on “Browse my computer for driver software.” 
Then click on “Pick from a List”, then Next. 
The driver is under Sound, video and game controllers. Highlight it and click Next.
Find and select Philips CE CSI on the left list and Philips SPC 900NC PC Camera on the right list. Click Next.
Another warning message comes up. Click Yes.
The drivers will be installed.
Finally a window will come up confirming that the drivers for the Philips Camera are installed on your PC. Click Close.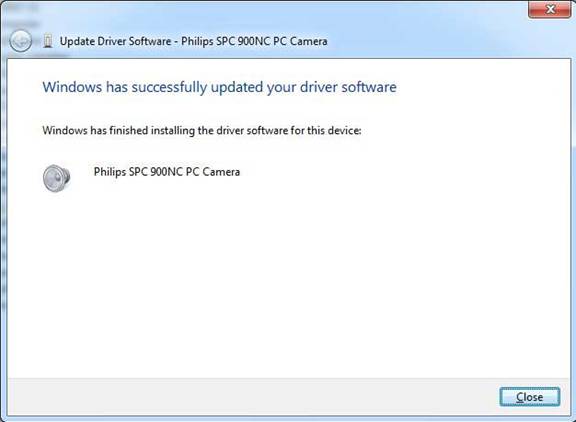
Device Manager will now show the camera under Sound, video and game controllers. 
Close the Device Manager window,
Open AMCap by either clicking on the desktop shortcut or going to the Start menu.
AMCap should show images from the camera (even without any optics attached, waving it around will show varying colors and intensity of images in AMCap). Under Options, make sure preview is selected.
If it does not show an image or displays “No capture device present”, unplug the camera, close AMCap and reboot.
After your PC is running, plug in the camera and open AMCap (the computer may display “Installing device driver software” in a briefly displayed balloon at lower right of your screen). AMCap will now display output from NexImage.
Updated 12/27/13