There are more high-quality, affordable, and user-friendly planetary imagers on the market today than ever before, making it easy to get started with astroimaging. But with so many choices, how do you decide? We asked Celestron's imaging expert, Product Manager Bryan Cogdell, some frequently asked questions to help you get started in this rewarding hobby.
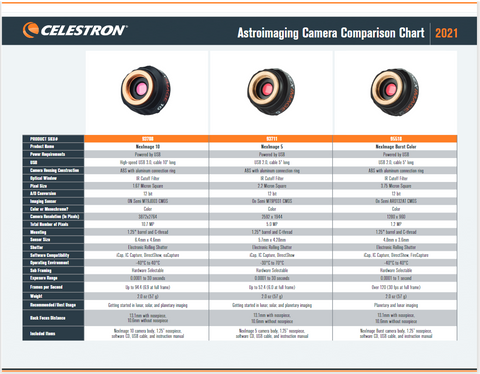
Download a free PDF to see key specs for all Celestron solar system cameras compared side-by-side for easy reference!
Q: What's the basic process for imaging an object within the solar system? Why can't I use my DSLR camera?
DSLRs can image just about anything, including solar system objects. But they are less ideal for imaging small planetary objects for two reasons. First, they use big imaging sensors for small objects. Saturn would look like a speck in a huge field of view, so you would not be utilizing most of the sensor area. Second, DSLRs are not as fast as a high speed planetary camera, in shutter speed or frame rate, and speed is paramount in planetary imaging.
Objects in the solar system are bright and usually high in contrast. So, images are taken with very short exposures. Planets are imaged at high magnifications, so things tend to look soft. On top of that, you are fighting the atmospheric conditions, which add unwanted blur to your images. During brief moments, the air stabilizes and the image is clear. But there’s one more hurdle; your camera generates noise. So you’ve got to overcome atmospheric turbulence and noise. This is addressed by taking many exposures—as many as you can in a minute or two. This is why frame rate is important. The more images you can capture, and the faster your shutter speed is, the better.
Important Tips for Solar System Imaging
- Image at high power or long focal length.
- Image with the fastest possible shutter speed.
- Image with the fastest possible frame rate.
- Stack your images and process them using readily available freeware like RegiStax and AutoStakkert. These programs automatically pick out the sharpest images and stack them to achieve an amazing planetary image.
Q: Do I have to travel to a dark sky site to do solar system imaging?
No need! Fortunately solar system objects are very bright and high in contrast, so they can be imaged just as well in a light polluted city as they would from a dark sky. Some of the best planetary images taken worldwide are often captured near large cities.
Q: What's the easiest and most affordable way to get started in solar system imaging?
A telescope with a lot of focal length for its aperture is ideal – Schmidt-Cassegrain telescopes are perfect for this! A NexStar 6SE paired with a NexImage camera would be a very nice and affordable combination.
Q: Should I wait until I have more experience to buy a high-end camera?
The good news with planetary imaging is the camera level does not necessarily have anything to do with level of difficulty. So you can advance to a higher quality camera without steepening the learning curve. As with telescopes, you should invest in the best quality imager you can afford to avoid outgrowing your equipment and having to upgrade later.
Q: How does the software vary from camera to camera?
Most cameras include capture software as a minimum. Software varies but has the same goal in mind – to control the camera, such as gain and exposure, and to capture and save images to your computer for processing.
All Celestron cameras come with complete capture and stacking software, so you can capture, process and share your images using the included software.
Q: What are the key differences between NexImage, NexImage 5, and NexImage Burst?
NexImage is the most affordable camera that will deliver good planetary images. At just under a megapixel, it’s powerful, fast and easy to use.
NexImage 5 packs many pixels into a small area, so it offers high resolution. 5 megapixels is great for lunar, solar, and general solar system imaging, including the planets.
NexImage Burst is the highest performing camera in its class. Don’t let the 1.2 megapixel count fool you (it’s not about the number of pixels), this camera has the highest sensitivity, speed, and image quality which will deliver the best planetary images.
Q: What makes the Skyris line of cameras unique?
Skyris are cameras exclusively designed by The Imaging Source in Germany and Celestron in California. The Imaging Source is the leading camera manufacturer for solar system imaging, and Celestron co-designed the camera to provide the best value and support. Celestron’s heat-sink aluminum housing and The Imaging Source’s flexboard engineering, sum to an amazingly compact and powerful camera, unique in the industry.
Q: USB 3.0 vs. USB 2.0: Is it worth the extra cost?
Yes. Speed is paramount in planetary imaging. The camera shutter and frame rate must be fast. USB 3.0 buys you a higher framerate because it can download images faster. This simply results in better planetary images.
Q: Color vs. monochrome: which is better?
Color imaging is easier because you get instant full color images. It’s also less expensive because you don’t need as many, if any, accessories.
Monochrome imaging potentially delivers better results because monochrome cameras are more sensitive. However, you must use a series of filters with your camera to obtain a color image. Adding filters makes monochrome imaging more expensive and slightly more involved, but the payoff will show in your images.
Q: How can I get started with solar imaging? Do I need a solar telescope?
If you already have a telescope, you can equip it with a full aperture solar filter. This will allow you to image the Sun in “white light” to see sunspot activity.
A dedicated solar telescope filters all but hydrogen-alpha light, revealing amazing solar features including prominences and flares.
Download a free PDF to see key specs for all Celestron solar system cameras compared side-by-side for easy reference!