This article comes to us from Grant Regen, a new guest blogger for Celestron. Grant is a 14-year-old amateur astronomer who is just getting started with astroimaging. In his series, "Learning Skyris," Grant will explain his process and provide tips and tricks for those new to imaging. We look forward to reading more from him!
Just as astronomers recommend the Moon as the first object to view in a telescope, so do astrophotographers recommend imaging the Moon first. When looking through a telescope, the Moon shows more detail than any other celestial object, which is the same as when imaging. Before you begin, though, you need to learn the basics of using Skyris.
Skyris is used and controlled with the software iCap. With iCap, you can change multiple features on Skyris including the two most important—exposure and gain. These both need to be changed under the Device option and then the Properties option in the program. A window will then appear allowing you to change the settings of exposure. Once you change the exposure so the object appears on your screen, you can move on to focusing the object. To best focus the picture, use the magnification feature on iCap. Once the image is focused to the best of your capability, change the gain so that it is as high as it can go without creating noise, or blurriness in the image. Set the exposure to just the right brightness to show the most detail after the image is both focused and has been set to the right gain. Now that this is all done, it is time to start the capturing process.
When capturing an object, you need to open another window on iCap. To access this window go to Capture and then to Toggle Recording Info Dialog. This window will allow you to change media file type, make the video compressed or not compressed, make the file’s name, chose how long the capture will be, and/or chose how many frames will be taken. When deciding whether to take the video compressed or not, pick not compressed to get the best performance from Skyris. The very last step is to select the amount of time the capture will be and/or how many frames it will be. Both options can be used, but time is much easier to estimate. For the Moon I usually take the video for about two to three minutes. With more time/frames you can play with your image more in RegiStax and get more detail out of it.

Now that the imaging process is over, you can escape the cold night and start the Registax processing at your ease. To export your video into RegiStax, you need to hit Select at the top, left hand corner. Once you have chosen the video, hit Select Alignment Points. Next, press Align so RegiStax can tell where your video shifted during capture. After this has gone through (it can take some time), go to the Limit Setup Box and select Best Frame. Play around with the limit percentage, and pick the best looking percentage which should be over 25%. Press Limit and let it run again. It will take you to the stacking page where you should press Stack. After the staking is over, go to Wavelet where the real magic happens. In Wavelet you can slide the bars on the left to increase detail on the image. On the right there are multiple features which I will talk about in later blogs. Hit Do All and then Save, and you are finished! Just remember one thing, with more practice come better images. Only experience will get your images truly better.

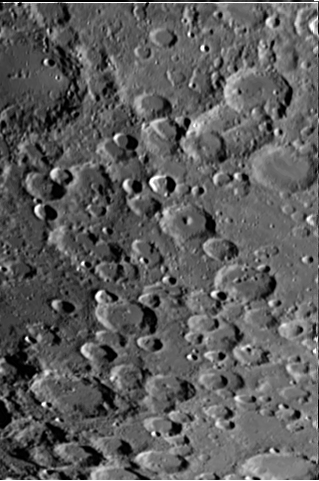
Coming back to the Moon, though, it is bright—very bright. This means that you don’t need a high exposure for capture and can have a higher fps, or frames per second. Out of all of the benefits of lunar imaging, what I most like about the Moon is that it has an endless amount of features. One night you can be looking at the flat maria and the next night the countless craters. You may even need a lunar map with the names of the features to identify what exactly you are imaging. Now that you know all of the basics, practice as much as possible because, in this case, practice makes perfect.
Clear Skies,
Grant Regen
