How to Install an Optional Finderscope on Your Schmidt-Cassegrain or EdgeHD Telescope
December 23, 2024

Adding an optional finderscope to your Schmidt-Cassegrain or EdgeHD telescope can greatly enhance your stargazing experience by making it easier to locate celestial objects. This guide will walk you through the process of safely installing a finderscope on your telescope, ensuring everything is properly aligned and secure.
Understanding the Mounting Screws
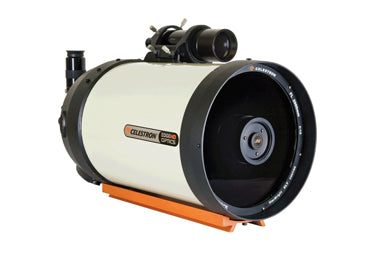
Both the StarPointer™ and optical crosshair finders are mounted on Schmidt-Cassegrain and EdgeHD telescopes using the same screw holes in the telescope's rear casting. Typically, there are two different types of screws on the body of these telescopes:
- Flush-Mounted Screws: These are structural screws that hold the components of the telescope tube together.
- Round-Head Screws: These screws are used for attaching accessories, like a finderscope.
The screws closest to the telescope's centerline, opposite the dovetail mounting plate, are used for mounting an accessory dovetail plate on top of the telescope. It's important to know which screws to use so you don't accidentally disturb the telescope's structural integrity.
Choosing the Mounting Location
You can mount the finderscope either to the left or right of the telescope's centerline, depending on your personal preference. The finderscope mounting holes are located on either side of the telescope's top centerline and have a separation of 1 and 5/8 inches.
Mounting the Finderscope
If you are installing a RACI (Right-Angle Correct Image) finderscope, the mounting screws are included. However, if you are using an aftermarket finderscope, it's crucial to make sure that the mounting screws have the same thread size as the original screws used in the finderscope mounting holes. Additionally, it's important to verify that the screws are not too long, as longer screws can damage the telescope's internal components.
To ensure the screws are the correct length:
- Retract the main mirror to the rear of the tube by turning the focuser knob clockwise until it stops.
- While installing the new screws, use a bright flashlight to look inside the tube. Ensure that the screws do not protrude more than a few threads into the tube. Protruding screws could come into contact with the mirror during focusing, causing damage.
Removing the Finderscope Bracket
If you ever need to permanently remove the finderscope mounting bracket from your Schmidt-Cassegrain telescope, make sure to reinstall the original hole-plugging screws into the open holes. Using the longer screws provided with the finderscope bracket without the bracket can result in those screws striking the main mirror, damaging it.
By following these steps and taking the necessary precautions, you can safely install an optional finderscope on your Schmidt-Cassegrain or EdgeHD telescope, enhancing your ability to navigate the night sky and make the most of your observing sessions.

